Orchid Root Rot: How to Identify, Treat & Repot a Rotting Orchid
How to tell healthy orchid roots from rotted ones, the step-by-step rescue repot that saves most plants, and how to recover an orchid with almost no roots left.
11 min read · Updated 2026-08-01
By PlantFix Editorial Team · Sources: University Extension Programs, USDA, EPA
How to Save an Orchid with Root Rot (Quick Answer)
Healthy orchid roots are firm and plump — silvery-white when dry, bright green after watering. Rotted roots are brown or black, mushy, flattened, or hollow; badly rotted ones slough their outer coating when touched, leaving a bare wiry thread.
The rescue: unpot the orchid, remove all the old media, and cut every dead root back to firm tissue with sterilized snips. Rinse the root system, let the cuts air-dry, then repot in fresh, chunky orchid bark — never potting soil — in a pot just big enough for the remaining roots. Water only when the roots turn silvery and the pot feels light, and the plant will regrow roots over the following months.
Even an orchid that has lost most of its roots is usually salvageable — moth orchids are remarkably hard to kill outright. The full procedure, including the high-humidity recovery method for plants with almost no roots left, is below. If you're not yet sure rot is your problem, the symptom overlap with simple dehydration is covered in the identification section — and in our orchid yellow leaves guide.
Why Orchid Roots Are Different (and Why Soil Kills Them)
Moth orchids are epiphytes — in the wild they grow clinging to tree bark, not in the ground. Their roots hang in the air, soak up tropical rain in minutes through a spongy silver sheath called velamen, then dry out again before the next storm. The green core inside even photosynthesizes.
Everything about orchid care follows from this. Velamen is built for a drench-then-dry cycle; held constantly wet, it can't breathe, and the root suffocates and rots. This is why orchids are potted in chunky bark with huge air gaps, why their pots have extra slots and holes, and why planting one in regular potting soil is a death sentence — as the Clemson Cooperative Extension notes, orchid media exist to provide air as much as moisture.
It's also why root rot is the number one killer of houseplant orchids. The watering habit that keeps a pothos happy — a good drink whenever the surface looks dry — keeps orchid roots wet enough, long enough, to rot them. Understanding the drench-and-dry rhythm is the whole game.
One reassuring note: the roots snaking out of the pot into the air are not a problem. Aerial roots are normal epiphyte behavior — leave them alone, and don't force them into the pot at repotting time.
How to Identify Root Rot (vs. a Thirsty Orchid)
Above the pot, a rotting orchid looks exactly like a dehydrated one: leaves lose their stiffness, go leathery and wrinkled, droop, and begin to yellow. Both problems have the same proximate cause — the plant can't move water — so you cannot diagnose from the leaves. You diagnose from the roots.
Look through the clear inner pot, or slide the plant out (orchids tolerate this well). Compare what you see:
- Healthy: firm, plump roots; silvery-white when dry, vivid green within minutes of watering; growing tips bright green or reddish.
- Rotted: brown to black, soft, mushy, or flattened roots; hollow or papery sections; outer sheath that slides off under a gentle pinch, leaving a thin wire; a sour or swampy smell in the pot.
- Dehydrated (not rot): roots shriveled, wrinkled, and silvery-gray but still firm and intact; bark bone-dry; no smell.
Other rot giveaways: the plant wobbles loosely in its pot because dead roots no longer anchor it, water sits in the pot far longer than it used to, and the bark at the center stays wet for a week or more. The medium itself is evidence too — bark that has broken down into dark crumbs holds water like a sponge and is usually what caused the rot in the first place.
A wobbling, wrinkled orchid with mushy brown roots needs the rescue repot below — today, not next weekend. Rot spreads root to root, and every firm root you save shortens recovery by months. (If the leaves are curling and wrinkling or dropping too, those guides cover the leaf side of the same water-transport failure.)
What Actually Causes Orchid Root Rot
Rot is opportunistic: constantly wet velamen suffocates and dies, and water-mold pathogens like Pythium and Phytophthora plus assorted fungi finish the job, spreading through the root system. The conditions that set it up are almost always one of these:
- Watering on a schedule instead of by root color. Watering every few days, or "a splash whenever I think of it," keeps the medium damp permanently. Orchid roots need to reach silvery-dry between drinks.
- Broken-down bark. Bark decomposes over one to two years into water-holding crumbs. An orchid that thrived for two years and then declined is often just sitting in expired media. Repot after bloom every year or two.
- Dense sphagnum moss packing. Growers use moss successfully, but tightly packed moss stays wet for a week or more in home conditions — with grocery-store orchids in moss, rot risk is much higher and watering must be much less frequent.
- No drainage. The classic trap: the clear culture pot sits inside a decorative cachepot, water collects in the bottom, and the roots stand in it invisibly. Always empty the outer pot after watering.
- Oversized pots. A big pot holds a big volume of wet media around a small root ball. Orchids like being snug; upsizing "to give it room" mostly gives rot room.
The Rescue Repot: Step-by-Step Treatment
You'll need fresh orchid bark, a clean pot with drainage (clear is ideal), sharp snips, and rubbing alcohol or a lighter to sterilize them. Sterilizing between cuts matters more with orchids than almost any houseplant, because incurable orchid viruses spread on blades.
- Water the orchid lightly an hour before surgery if the roots are dry — hydrated roots are less brittle and easier to judge.
- Slide the plant out of its pot and remove every scrap of old media from the roots. Old bark and moss carry the rot organisms; none of it goes in the new pot.
- Rinse the whole root system under lukewarm running water so you can see clearly what's alive.
- Cut every dead root back to firm, living tissue with sterilized snips: everything brown, black, mushy, hollow, or stringy goes. Cut into the healthy zone slightly rather than leaving a rotten stub. Re-sterilize the blades between cuts on badly rotted roots.
- Optional but useful: flush the trimmed root zone with 3% hydrogen peroxide, or dust the cut ends with ground cinnamon — a traditional grower's antifungal. Let the plant sit bare-root for a few hours so cuts dry and seal.
- Repot into fresh, barely-damp orchid bark in a pot sized to the surviving roots — snug, not roomy. Set the plant so the base of the lowest leaf sits just above the bark line, work bark in around the roots by tapping the pot, and leave aerial roots outside.
- Hold off watering for five to seven days so the cut surfaces callus rather than reinfect, then begin watering by root color: drench when silvery, never while green.
If the plant is in bloom, cut the flower spike off at the base with sterile snips, even though it hurts. A rotted root system cannot support flowers and recovery at once, and the spike will drain exactly the reserves the plant needs to regrow roots.
Saving an Orchid with Few or No Roots
An orchid that comes out of the pot with almost nothing salvageable — one or two firm root stubs, or none — is not necessarily done. As long as the crown (the central growing point where leaves emerge) is firm and green, the plant can regrow a root system. It just needs months of high humidity to survive on while it does.
The standard technique is the humidity chamber, known among growers as "sphag and bag": put a shallow layer of damp — not wet — sphagnum moss in the bottom of a clear container or large zip bag, and suspend or rest the bare-root orchid so its base sits just above the moss, not touching it. Close the container most of the way, leaving a small gap for air exchange, and park it in bright indirect light, never sun (a sealed clear box in sunlight cooks in minutes).
The humid air around the base coaxes new root nubs out within four to eight weeks; they look like tiny green bumps with bright tips. Open the container briefly every few days to refresh the air and check for mold, and re-dampen the moss as it dries. Once several new roots reach a couple of inches, pot the orchid into a small pot of fresh bark and transition to normal watering.
Expect the plant to look rough throughout — it may sacrifice a lower leaf or two for the energy. That's the plant budgeting, not failing. Recovery to a blooming plant typically takes a year. Patience is the entire skill.
Preventing Root Rot for Good
Everything about prevention reduces to one habit: water by evidence, not by calendar.
- Read the roots. Silvery roots and a light pot mean water today; green roots or a heavy pot mean wait. For most homes this lands near once a week in summer and every 10–14 days in winter — but the roots, not the interval, are the rule.
- Water thoroughly, then drain completely. Take the pot to the sink and run lukewarm water through the bark for a minute, or soak the pot for 10–15 minutes, then let it drain fully. Never leave standing water in the decorative outer pot.
- Water in the morning, and keep the crown dry. Morning watering lets any splash in the crown evaporate by night; water sitting overnight in the crown causes crown rot, which kills faster than root rot. Blot the crown with a paper towel if water pools there.
- Repot every one to two years, after flowering, before the bark breaks down — fresh media is cheaper than rescue surgery.
- Keep pots snug and drainage generous. Upsize only when roots truly fill the pot, and prefer slotted clear orchid pots that let you see root color at a glance.
- Give it air. Gentle air movement dries media on schedule and discourages every rot pathogen an orchid meets. A small fan in the plant room, or just not crowding the windowsill, goes a long way.
Recommended Products
We earn a commission if you buy through these links, at no extra cost to you. We recommend based on what works, not what pays. How this works.
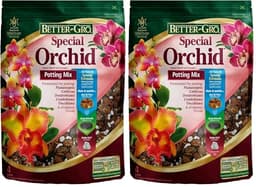
Fresh, chunky fir bark is the actual medicine for root rot — it gives surviving roots the drench-and-dry cycle velamen requires. Buy enough to replace all the old media; none of the old bark or moss should follow the plant into the new pot. Medium grade fits most moth orchids.
$8-$15 · Best for The rescue repot and every routine repot after
Check price on Amazon →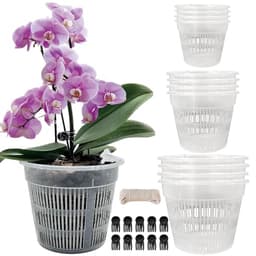
Clear pots with side slots turn watering from guesswork into observation: silver roots mean water, green roots mean wait. The extra slots add the airflow that keeps bark drying on schedule. Size the pot to the surviving root ball — snug, not roomy.
$8-$14 · Best for Watering by root color and maximizing root-zone airflow
Check price on Amazon →
Sharp snips make clean cuts through rotted roots without crushing the living tissue behind them. Sterilize with rubbing alcohol between cuts and between plants — orchid viruses are incurable and travel on blades, so the alcohol wipe is non-negotiable.
$8-$15 · Best for Trimming dead roots back to living tissue during the rescue repot
Check price on Amazon →
A one-time flush of the trimmed root zone during the rescue repot helps disinfect cut surfaces — it fizzes on damaged tissue and suppresses rot organisms. Use standard drugstore 3% undiluted as a rinse at surgery time only; it is not a routine watering additive.
$1-$3 · Best for Disinfecting the root zone once during the rescue repot
Check price on Amazon →Treatment information on PlantFix is educational. When using any pesticide — including organic options like neem oil or insecticidal soap — read and follow the entire product label; the label is the law. For persistent or high-stakes problems, your local university extension service offers free, region-specific advice. Read about how we source and verify treatment guidance in our Editorial Standards.
FAQ
Can an orchid survive with no roots?▼
Often, yes — if the crown is still firm and green. Moth orchids can regrow an entire root system from a rootless base given months of high humidity, which is what the "sphag and bag" recovery chamber provides. Survival odds drop sharply if the crown itself is soft, brown, or pulls apart, because the growing point is what produces both new roots and new leaves. Firm crown: worth saving. Mushy crown: usually not.
How often should I water my orchid after treating root rot?▼
Wait five to seven days after the rescue repot so the trimmed roots callus, then switch permanently to watering by root color: drench thoroughly when the roots look silvery and the pot feels light, and wait while they're green. A freshly trimmed plant with few roots dries slower than you'd expect, since less root mass is drinking — so the interval is often longer than before, not shorter. Resist the urge to "help" a recovering orchid with extra water; that's what caused the rot.
Is hydrogen peroxide safe for orchid roots?▼
A flush of standard 3% hydrogen peroxide over the root zone during a rescue repot is a common grower practice and generally safe — it fizzes on contact with damaged tissue and helps disinfect the surgical site. Don't make it routine, though: repeated peroxide watering damages the beneficial microbes and root tissue you're trying to protect. Use it once at repotting time, and rely on trimming, fresh media, and correct watering for the actual cure.
Should I cut off the flower spike when treating root rot?▼
Yes. Flowers are the most expensive thing an orchid does, and a plant with a damaged root system cannot fund blooming and root regrowth at the same time. Cut the spike at its base with sterilized snips as part of the rescue repot. It feels like giving up the best part, but it roughly doubles the energy available for recovery — and a successfully rescued orchid will bloom again on a new spike, typically within a year.
What's the difference between brown roots and black roots?▼
Both are dead or dying; the color mostly reflects how long ago and which organisms moved in. Tan-brown, dry, papery roots often died from age or dehydration, while dark brown to black, wet, mushy roots are active rot. Treatment is the same either way — cut back to firm, living tissue — but wet black rot spreads, so it makes the repot urgent rather than optional. A healthy root, for reference, is never brown: it's silver-white dry, green wet.
Are the roots growing out of the pot a problem?▼
No — aerial roots are normal, healthy epiphyte behavior, not a sign the plant is root-bound or rotting. They're doing what orchid roots evolved to do: gripping and drinking from the air. Don't cut them off, and don't force them down into the media at repotting, where the constant moisture can rot them. If a wandering aerial root offends the decor, the worst it deserves is a gentle redirect.
Related
- Orchid Yellow Leaves: What Each Pattern Means & How to Fix It →
- How to Revive a Dying Orchid: The 60-Second Triage →
- Orchid Leaves Curling or Wrinkled: Causes & Fixes →
- Orchid Leaves Falling Off: When It's Normal & When to Act →
- Yellow Leaves on Plants: Every Cause & How to Fix It →
- Mealy Bugs on Plants: How to Identify & Kill Them Fast →
- Insecticidal Soap: What It Actually Kills (Including Spider Mites), DIY Recipe & Why Dawn Is Wrong →
- Kill Mealybugs With Rubbing Alcohol (on Contact, No Burn) →
Not sure what's wrong?
Use the diagnosis tool →Get seasonal plant care reminders and pest alerts.